
Wireless Spectrum Management: Part 1
Setting up your radio frequency environment.
3 January 2013
Text:/ Andy Ciddor
Wireless transmission of audio, video and IP data is an absolutely brilliant idea whose time has well and truly arrived. In fact it’s such a great idea that its success has driven it to the cusp of becoming a total failure. While Metcalfe’s highly-respected law states that the value of a communications network is proportional to the square of the number of devices connected to the network, it really only holds true for wired systems. Every new wireless device switched on in the world makes it just a little bit harder for all the other wireless devices to connect reliably.
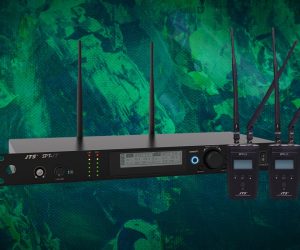
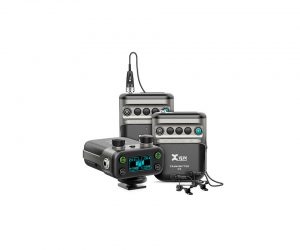
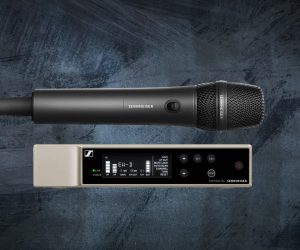
Even after decades of development, when we finally got to the point where a very sophisticated wireless microphone link sounds nearly as good as a bargain-basement mic cable, using two wireless microphones on the same event is fraught with the dangers of crosstalk, intermodulation products and multipath interference.
There really are only two stark choices when it comes to wireless data transmission: either abandon the idea and use a nice, cheap, reliable cable instead (my personal favourite), or aggressively manage the wireless spectrum around your installation or event.
As none of you are going to give up your wireless data addiction any time now, I took it upon myself to get some advice for AV readers from Steve Caldwell, one of the world’s most experienced and sought-after wireless spectrum managers for production. Caldwell has been the technical manager and radio frequency (RF) engineer at international high-flyers Norwest Productions since shortly after the discovery of sound. Although one of his most recent jobs was to spend a couple of years working on the wireless spectrum management plan for the 2012 London Olympics, he spoke with me about RF spectrum matters for the kinds of projects we encounter every day.
I asked Steve to take us through the process of working out and managing a spectrum plan for an event.
WHO’S BRINGING WHAT
“The first and most important step is to get as much information as you can on the RF equipment that will be used by other parties at the gig. You need to get in contact with other people who are going to be there, find out what they’re going to use in the way of comms gear, belt-pack radios, any stage management communications systems – even get in touch with the audio guys from the various acts. If they’ve got special requirements or they’re bringing their own equipment it’s really important to find out what they’re bringing. Most professional acts will have someone who is responsible for their RF equipment, and more often than not they’re very keen for you to contact them.
“And it’s not just ringing them up and asking what frequency they’re using, because they’ll just read off a list of frequencies that they’ve probably used at every gig since the year dot. What you need to find out is the brand and exact model of equipment they’re using so that if a frequency change needs to be done, you already know what their units’ switching bandwidth is, and what their capabilities are.
“It is handy to find out if they’re using existing frequencies and if they’re happy with them. If these frequencies can be integrated into a solution without being changed, it makes it all the easier for you and the act. However, if you’re doing a show that has 150 frequencies on it, chances are you can’t use the frequencies that they’ve had programmed into their gear and you’ll need to resolve new frequencies for them. In order to do that you need to know the capabilities of their gear.”
CHECKING THE LIE OF THE LAND
The next step is to do a scan of the RF environment before anybody gets there.
“This is very important. The idea is to get a background, what I call a ‘landscape’ of the RF environment. You’re trying to identify all the services that you know will be there including TV stations and things like that. This is still long before you’ve calculated your solution.
“Once comms have turned up with their known batch of hand-helds, belt-packs and base duplex radios, you can then do a scan to find out exactly where their fundamentals are sitting and where their intermod products are sitting. Because quite often it’s hard to just extrapolate all intermods from the fundamentals. You need to go in and actually see how they’re mixing with other known services. You can then use that to identify additional RF landscape obstacles to avoid. It’s not enough to go in there and sit at the FOH position and run the scanner for half an hour. You need to move the antenna around to avoid any nulls in the services you’re scanning for.
STAY FOREVER VIGILANT
“Once you’ve done that you need to continually scan. You can scan in a couple of different ways.
I scan with both a dedicated discrete antenna, and using an output from the radio mic antenna distribution system, so that I can see exactly what the radio mic receivers are seeing. This is important for a couple of reasons. The first is because the antennas are obviously going to be in different places, so they’re not getting the same signal. The second is that a lot of the off-the-shelf antenna and booster systems in current use are capable of generating their own receiver-based intermod products. Intermod products can not only be generated by transmitters and be present in the air, they can just as easily be generated in the front end pre-amplifiers of radio mic receiver systems. You really need to be able to detect this and ensure that these intermod products don’t impact on any of your valuable frequencies.
“Quite often you’re side of stage at the monitor position and you’ve got your radio racks and antennas down there. You may find that the comms guys will set up next to you and if they’ve got their base-station duplexes running at 5W right next to you, your scanner antenna might only see fundamentals but you might find that there is a whole mess of intermod product being generated inside the radio mic receive system that you really ought to know about.
MAKING YOUR PLAN
“The next step is to resolve a plan of radio mics, IEMs, and what have you. If you have the ability to determine the bands of equipment that you can use for the event, now is the time to do it. Ideally what you want to do is gain some RF spectral separation between your IEM system transmitters and your radio mic receivers, as it will help reduce the amount of intermod product that the radio mics are exposed to. Maintaining a minimum 50MHz separation will really simplify the calculation of your overall solution.
“Keep a master list of all the frequencies that you resolve. Often you have to change your solution depending on people arriving with different equipment. It’s not always possible to integrate a third party set of RF gear into what you’ve already done, and you may have to start again and re-resolve the entire system, which is painful at best. Everybody has to re-tune, so it’s important to make sure that new list of frequencies is distributed to all of the relevant people, otherwise you can get yourself into all sorts of trouble.
A TESTING TIME
“Once you’ve resolved these frequencies and entered them into the gear, the next important thing is to do a walk around with all the gear, including radio microphones. Make sure your IEM transmitters are actually turned on and running at the power level you intend to use before you do the walk. I’ll often see people setting up an RF system and they’ll set up radio mics because they need to do rehearsals or shout mic-type use, and they’ll do a quick walk around with the radio mics before the IEMs have even been unpacked. And once they’ve done all that and everybody is happy, they turn on their IEMs and find that their radio mics are suffering badly.
“As part of the radio mic setup and installation procedure, if I have the ability, I tune all of the radio mic receivers to the same frequency (or frequencies if multiple bands are in use). Then I take radio mics set to those frequencies out onto the floor, leave them sitting on mic stands and confirm that all of my receivers are picking up the same transmission at the same signal strength. Your system can have an issue that’s difficult to detect because all of the radio transmitters are turned on and tuned to different frequencies so you can’t tell whether the issue is based in RF or whether it’s a result of the patching system itself. And always check that your receiver distros are actually powered on before spending time fault finding a bank of suspect equipment.
“If you look at the receivers and one has four bars of signal strength and another’s got three bars, yet they’re both receiving the same transmitter, you know there’s something wrong. It’s amazing how many issues are resolved from the patching system itself – anything from badly-tuned receivers that need trimming, to poor BNC connections.
“Once you have retuned all receivers to their allocated frequencies and all the microphones are tuned and turned on, you can then turn off each mic transmitter, one by one, and ensure that the allocated receiver shows no RF activity after that transmitter is turned off. If for instance you turn a transmitter off and find that you’ve still got signal, you know that either there’s something else transmitting on that frequency or you’re picking up an intermod.
“It’s more likely an intermod product, and that can actually be caused by people when they set up their radio microphones with all their radio transmitters turned on, but they’re gathered together on a bench somewhere. These transmitters have fairly simplistic RF window filtering and isolation. They don’t have the space in there to put huge amounts of filter electronics, so the transmitters themselves are fairly susceptible to other transmitters, particularly at close range. You can quite easily hold two transmitters together and obtain a third order product that’s higher in magnitude than either of the fundamentals. You need to be very aware that all your transmitters aren’t all lined up together in on a bench or in a drawer somewhere and all switched on, because that will produce a massive quantity of intermod product which you’ll never get away from. Nothing creates more intermods than co-located transmitters.”
SHOWTIME
If you’ve been following Steve’s instructions, your wireless systems should be running and tested and ready for the show. However, wireless spectrum plans are a like battle plans in that they don’t survive the first minutes of a skirmish. In part two of this series we’ll look at how to manage your system through the vagaries of a performance and make it out alive.
INTERMODS
Intermods are the additional signals produced by the intermodulation between two fundamental signals. The frequencies produced include the sum of and the difference between the two fundamentals, plus a range of additional intermodulation products between the harmonics of the fundamentals and the sum and difference signals.


RESPONSES